搭建某V姓工具
1. 准备工作
这里我使用 CentOS Stream 9 作为服务器的操作系统,其他 Linux 发行版也能用。
1.1. 从 CentOS 切换到滚动更新的 CentOS Stream (已过时)
如果你的服务器供应商没有最新的 CentOS Stream 9,也可以使用 CentOS Stream 8。但是对于 CentOS 8 用户,红帽已经停止更新了,需要切换到 CentOS Stream 8。
CentOS Linux 8 will reach End Of Life (EOL) on December 31st, 2021. The CentOS Linux 8 packages have been removed from the mirrors.
1
2
3
4
5
6
7
8
# 来自 CentOS 社区的解决方案
rpm -iv --replacepkgs https://vault.centos.org/8.0.1905/BaseOS/x86_64/os/Packages/centos-release-8.0-0.1905.0.9.el8.x86_64.rpm

sed -i 's/mirrorlist/#mirrorlist/g' /etc/yum.repos.d/CentOS-*
sed -i 's|#baseurl=http://mirror.centos.org|baseurl=http://vault.centos.org|g' /etc/yum.repos.d/CentOS-*

dnf distro-sync
dnf --disablerepo '*' --enablerepo extras swap centos-linux-repos centos-stream-repos
1.2. 开启 yum-plugin-fastestmirror 插件与多线程下载
对于那些网络条件不太好的vps可以选择开启
The fastest mirror plugin is designed for use in repository configurations where you have more than 1 mirror in a repo configuration. It makes a connection to each mirror, timing the connection and then sorts the mirrors by fastest to slowest for use by yum.
1
2
echo "fastestmirror=1" >> /etc/dnf/dnf.conf
echo "max_parallel_downloads=8" >> /etc/dnf/dnf.conf
1.3. 更新软件包并安装必要的软件包
部分是必需品,另一部分是 debug 用的方便的。
1
2
3
yum update -y
yum install -y epel-release
yum install -y vim nano htop git wget unzip bash-completion net-tools tree
1.4. 开启 Google BBR
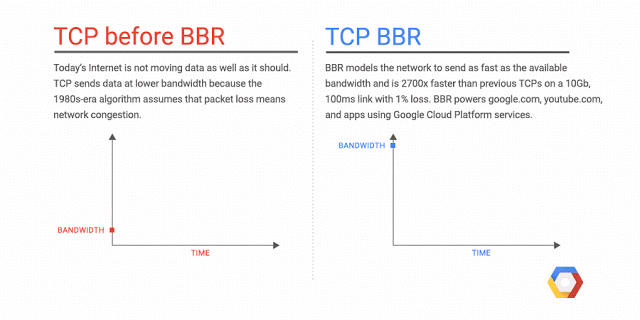
BBR (“Bottleneck Bandwidth and Round-trip propagation time”) is a new congestion control algorithm developed at Google. Congestion control algorithms — running inside every computer, phone or tablet connected to a network — that decide how fast to send data.
BBR 是谷歌开发的新型 TCP 拥塞控制算法。在此以前,互联网主要使用基于丢包的拥塞控制策略,只依靠丢失数据包的迹象作为减缓发送速率的信号。BBR尝试通过使用全新的拥塞控制来解决这个问题,它使用基于延迟而不是丢包作为决定发送速率的主要因素。对于高丢包率与高时延的网络环境,相较于 Linux 默认的 Cubic 算法具有更高的带宽。 关于 Google BBR 的相关内容跟可以参考来自谷歌的产品介绍和这篇来自 AWS 的博客。
BBR 从 4.9 版本开始就已经出现在 Linux 内核之中,可以通过一个简单的 sysctl 命令来启用。
1
2
3
echo "net.core.default_qdisc=fq" >> /etc/sysctl.conf
echo "net.ipv4.tcp_congestion_control=bbr" >> /etc/sysctl.conf
sysctl -p
校验你的 BBR 是否开启,如果返回的结果中带有 bbr 说明已经生效。
1
2
sysctl -n net.ipv4.tcp_congestion_control
lsmod | grep bbr
1.5 系统调优 TuneD
tuned-adm 是一个命令行工具,可让您在 Tuned 配置集间切换以提高特定用例的性能。它还提供了 tuned-adm recommend 子命令,用于评估您的系统并输出推荐的调优配置文件。具体内容可以参考红帽给出的文档。
1
yum install tuned -y
查看推荐的配置文件
1
tuned-adm recommend
应用指定配置文件,针对 vps 优化可以使用 virtual-guest,为 Red Hat Enterprise Linux 9 虚拟机和 VMWare 虚拟机设计的配置集基于 throughput-performance 配置集(除其他任务)减少了虚拟内存的交换性并增加磁盘预读值。它不会禁用磁盘障碍。它继承 throughput-performance 配置集,该配置集将 energy_performance_preference 和 scaling_governor 属性更改为 performance 配置集。
1
tuned-adm profile virtual-guest
1.6. 使用 chrony 校时
这次我们使用的 VMess 依赖于系统时间,请确保使用 V2Ray 的系统 UTC 时间误差在 90 秒之内,时区无关。
1
2
yum install chrony -y
systemctl enable --now chronyd
修改 /etc/chrony.conf 为服务器添加额外的 ntp 服务器。
这里提供几个可供参考的 ntp 服务器:
1
2
3
4
5
6
7
8
9
10
11
12
13
14
15
16
# Google Public NTP
server time1.google.com iburst
server time2.google.com iburst
server time3.google.com iburst
server time4.google.com iburst

# NTP Pool Project (以亚洲-中国为例)
server 0.asia.pool.ntp.org
server 1.asia.pool.ntp.org
server 2.asia.pool.ntp.org
server 3.asia.pool.ntp.org

server 0.cn.pool.ntp.org
server 1.cn.pool.ntp.org
server 2.cn.pool.ntp.org
server 3.cn.pool.ntp.org
1.7. 修改服务器 Hostname
都是你的服务器了,改个主机名吧~
1
hostnamectl hostname xxx
2. 安装 VMess + TLS + WS
这里选择是“终极配置”,虽然带宽损耗相较其他方法更高,但目前来看仍然是最稳定的。Trojan 在前段时间出现利用 tls-in-tls 特征可以被精确识别,VLess 协议至今还没有全平台的订阅格式。安装方法采用 apache 反向代理 + Podman 容器。采用 Podman 的原因是这么做可以拿来做中转代理,一次部署多个 VMess 服务。
2.1. 安装 Apache httpd & Podman
1
2
3
yum install -y podman podman-compose
yum install -y httpd mod_ssl openssl
systemctl enable httpd
2.2. 安装 V2Fly
1
mkdir /podman && cd /podman
添加 Podman compose 文件 container-compose.yml
1
2
3
4
5
6
7
8
9
10
11
version: 1.0
services:
  v2fly:
    image: docker.io/v2fly/v2fly-core:latest
    container_name: V2Fly
    command: run -c /etc/v2fly/config.json
    volumes:
      - /podman/v2ray/config.json:/etc/v2fly/config.json:Z
    ports:
      - "127.0.0.1:10000:10000"
    restart: always
写入你的 V2Fly 配置文件 /podman/v2ray/config.json 其中 uuid 需要你去生成
1
mkdir /podman/v2ray
1
2
3
4
5
6
7
8
9
10
11
12
13
14
15
16
17
18
19
20
21
22
23
24
25
26
27
28
{
  "inbounds": [
    {
      "port": 10000,
      "listen":"0.0.0.0",
      "protocol": "vmess",
      "settings": {
        "clients": [
          {
            "id": "********-****-****-****-************"
          }
        ]
      },
      "streamSettings": {
        "network": "ws",
        "wsSettings": {
        "path": "/ray-way/"
        }
      }
    }
  ],
  "outbounds": [
    {
      "protocol": "freedom",
      "settings": {}
    }
  ]
}
运行 V2Fly 容器
1
2
cd /podman
podman-compose up -d
查看正在运行的容器
1
podman ps
2.3. 为 httpd 配置证书
安装 acme.sh
1
2
yum install tar socat -y
curl https://get.acme.sh | sh
acme.sh 脚本默认的证书颁发者 ZeroSSL 不好用,需要切换成 Let's Encrypt
1
~/.acme.sh/acme.sh --set-default-ca --server letsencrypt
开放 80/443 端口,并确保没有程序占用以便安装证书
1
2
3
firewall-cmd --permanent --add-port=80/tcp
firewall-cmd --permanent --add-port=443/tcp
firewall-cmd --reload
安装证书,修改 your-domain.example.com 为你的域名
1
2
3
mkdir -p /etc/pki/httpd/private
~/.acme.sh/acme.sh --issue -d your-domain.example.com --standalone -k ec-256
~/.acme.sh/acme.sh --installcert -d your-domain.example.com --fullchainpath /etc/pki/httpd/server.crt --keypath /etc/pki/httpd/private/server.key --ecc
2.4. 编辑 httpd 配置文件
在 /etc/httpd/conf.d/ssl.conf 中修改和添加一下内容
1
2
3
4
5
6
7
8
9
10
11
12
13
14
15
# <VirtualHost _default_:443>
# 修改
SSLCertificateFile /etc/pki/httpd/server.crt
SSLCertificateKeyFile /etc/pki/httpd/private/server.key

# 添加
SSLProxyEngine On
SSLProtocol all -SSLv3 -TLSv1 -TLSv1.1

<Location "/ray-way/">
    ProxyAddHeaders Off
    ProxyPreserveHost On
    RequestHeader append X-Forwarded-For %{REMOTE_ADDR}s
    ProxyPass "ws://127.0.0.1:10000/ray-way/" upgrade=WebSocket
</Location>
启动 httpd,并修改 selinux 权限
1
2
systemctl start httpd
setsebool -P httpd_can_network_connect 1
2.5. 额外的几个工作(选作)
2.5.1. 为你的 V2Fly 添加 ipv6 支持
在 podman/podman-compose 中创建的默认网桥并不支持ipv6,需要手动添加
如果你是 cni 网桥,则修改 /etc/cni/ 下的 xxx,否则修改 /etc/containers/network/ 下的 podman_default.json
cni 网桥需要修改的部分:
1
2
3
4
5
6
7
8
9
10
11
12
13
14
15
16
17
18
19
20
21
22
"routes": [
    {
      "dst": "0.0.0.0/0"
    },
    {
      "dst": "::/0"
    }
],
"ranges": [
    [
      {
          "subnet": "10.89.1.0/24",
          "gateway": "10.89.1.1"
      }
    ],
    [
      {
          "subnet": "fde0:fee8:4b9:2476::/64",
          "gateway": "fde0:fee8:4b9:2476::1"
      }
    ]
]
containers 网桥需要修改的部分:
1
2
3
4
5
6
7
8
9
10
11
"subnets": [
  {
    "subnet": "10.89.0.0/24",
    "gateway": "10.89.0.1"
  },
  {
    "subnet": "fde0:fee8:4b9:2476::/64",
    "gateway": "fde0:fee8:4b9:2476::1"
  }
],
"ipv6_enabled": true,
重启容器网桥,或者重启服务器
2.5.2. 为你的容器设置开机自启
具体命令行操作请自行搜索,理论上是
1
2
systemctl enable --now podman.socket
systemctl enable --now podman-restart.service
但是如果你完成下面 cockpit 的安装了就仅需要登陆后点击开机自启动 Podman
编辑 nano /etc/cockpit/disallowed-users 允许 root 登录 root -> # root
2.5.3. 为 http 协议添加跳转
在 /etc/httpd/conf.d/ssl.conf 最下方添加一下内容,修改 your-domain.example.com 为你的域名
1
2
3
4
5
<VirtualHost *:80>
    <IfModule alias_module>
        Redirect permanent / "https://your-domain.example.com"
    </IfModule>
</VirtualHost>
3. 客户端的选用
Windows & MacOS & Linux Desktop: QV2ray (如果使用 v5.0+ 的 vcore 需要自行构建新版 QV2Ray)
iOS: Shadowrocket
4. 更新与维护
更新容器
1
2
cd /podman
podman-compose pull && podman-compose up -d
删除多余的中间镜像
1
podman rmi $(podman images -a | grep "<none>" | awk '$1=="<none>" {print $3}')